
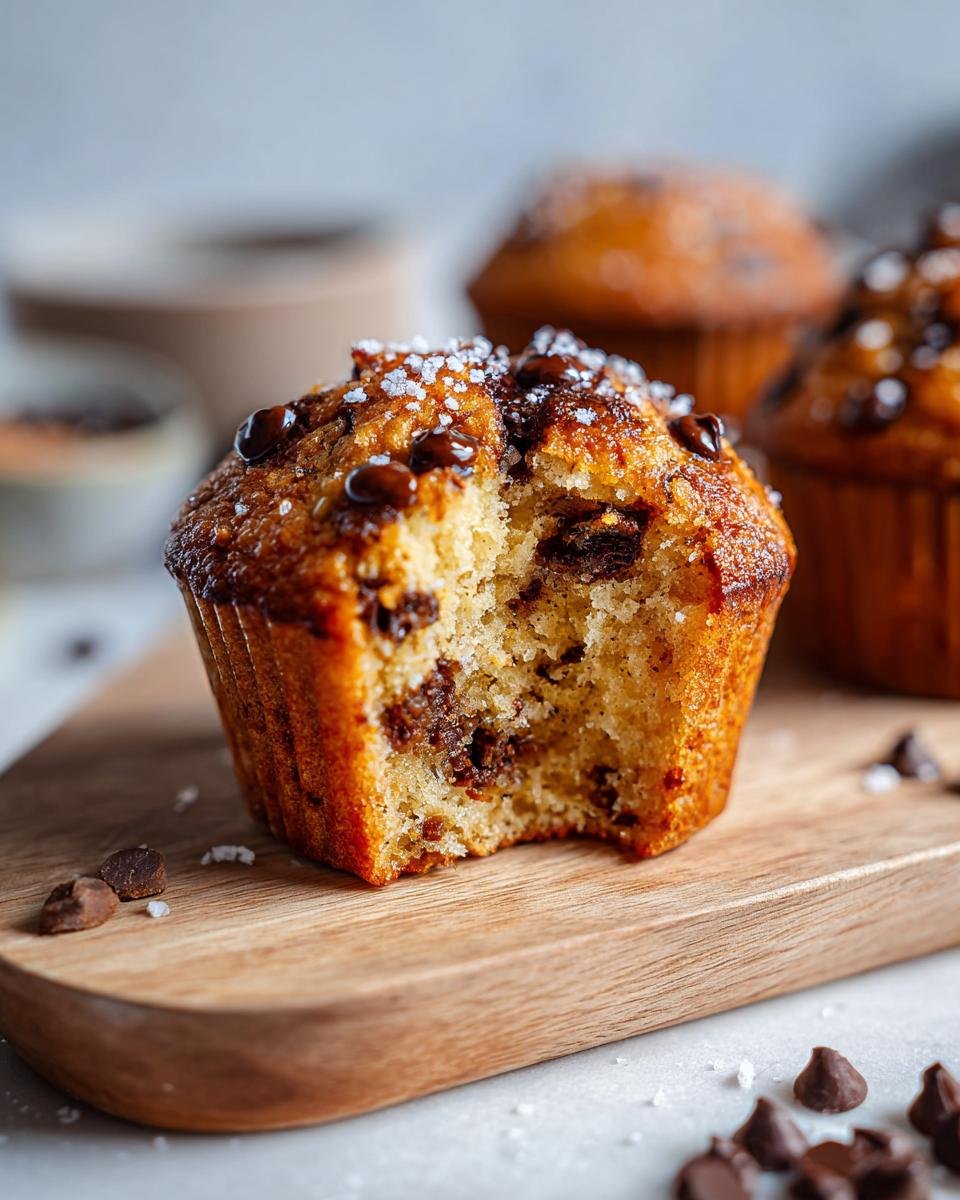
There’s something magical about the aroma of fresh muffins wafting through the house, isn’t there? It’s like a warm hug on a chilly morning. When I bake Bakery Style Chocolate Chip Muffins, I can’t help but feel a sense of nostalgia. I remember the first time I tried to make muffins with my mom. We ended up with a kitchen covered in flour and giggles, and even though the muffins were a little lopsided, they were simply the best I’d ever tasted! These muffins are a game changer—fluffy, rich, and studded with mini chocolate chips that melt in your mouth. They have that bakery-style grandeur that makes even the simplest breakfast feel special. Trust me, once you take a bite, you’ll know exactly what I mean! Whether it’s a cozy brunch with friends or a sweet treat for the kids after school, these muffins always deliver joy and satisfaction. Let’s get baking!

Ingredients List
- 2 1/2 cups all-purpose flour
- 2 teaspoons baking powder
- 1 teaspoon baking soda
- 1/4 teaspoon salt
- 1/2 cup unsalted butter, room temperature
- 1 cup granulated sugar
- 1 tablespoon alcohol-free vanilla flavor or vanilla powder
- 2 large eggs
- 1/4 cup sour cream, room temperature
- 3/4 cup buttermilk, room temperature
- 1 1/2 cups mini chocolate chips
- Coarse or decorating sugar, for sprinkling
How to Prepare Bakery Style Chocolate Chip Muffins
Step 1: Preheat and Prepare
First things first—let’s get that oven preheating! Set it to 425°F (220°C). This high temperature is key to creating those beautiful muffin tops that we all love. While the oven warms up, grab a 12-cup muffin tin. You can either butter it generously or line it with paper liners for easy removal later. I personally love the buttery way the muffins come out when I skip the liners, but it’s totally up to you!
Step 2: Mix Dry Ingredients
Now, in a medium bowl, whisk together the dry ingredients: 2 1/2 cups of all-purpose flour, 2 teaspoons of baking powder, 1 teaspoon of baking soda, and 1/4 teaspoon of salt. Whisking brings air into the dry mixture, which is super important for fluffiness later on. Just a minute of mixing here makes all the difference!
Step 3: Cream Butter and Sugar
In a large bowl, it’s time to beat 1/2 cup of unsalted butter (make sure it’s at room temperature!) with 1 cup of granulated sugar. Use a hand mixer or stand mixer and beat this mixture for about 2 minutes until it’s light and fluffy. You’re looking for that pale yellow color and a texture that feels airy and not too dense. This step is crucial for those lovely, fluffy muffins!
Step 4: Add Eggs and Vanilla
Next, add in 2 large eggs, one at a time, mixing well after each addition. Then, toss in 1 tablespoon of alcohol-free vanilla flavor or vanilla powder. This will make your batter smell absolutely divine! Keep mixing until everything is well combined. You should see a silky batter starting to form, and the edges should look smooth.
Step 5: Incorporate Dairy
Now it’s time to fold in the dairy. Gently add in 1/4 cup of sour cream and 3/4 cup of buttermilk, both at room temperature. Use a spatula to fold in these ingredients carefully. The goal is to combine them without overmixing, which could make your muffins tough. Just mix until you don’t see any big lumps; a few streaks are perfectly fine!
Step 6: Combine Wet and Dry Ingredients
Now, let’s bring it all together! Carefully fold the dry ingredients into the wet mixture until just combined. You want to see a few flour streaks remaining. This is crucial—overmixing here can lead to dense muffins, and we want fluffy, bakery-style perfection!
Step 7: Fill Muffin Cups
It’s time to fill those muffin cups! Use a measuring cup to fill each muffin cup to the top, about a generous 1/3 cup of batter each. This will help achieve those beautiful dome shapes. If you’re feeling extra indulgent, sprinkle some coarse sugar and a few more mini chocolate chips on top. Trust me, you want that crunch!
Step 8: Bake the Muffins
Now, let’s pop those beauties into the oven! Bake at 425°F for the first 5 minutes to get that initial rise, then reduce the temperature to 375°F (190°C) and continue baking for another 13–15 minutes. Keep an eye on them towards the end; you know they’re done when they’re lightly golden and a toothpick inserted in the center comes out clean or with just a few moist crumbs. Let them cool in the pan for about 5 minutes before transferring them to a wire rack to cool completely. Your kitchen is about to smell heavenly!
Why You’ll Love This Recipe
- Quick Preparation: With just 15 minutes of prep time, you can whip up these muffins in no time, making them perfect for busy mornings or last-minute gatherings.
- Delicious Chocolate Flavor: Mini chocolate chips melt beautifully into the batter, creating delightful pockets of chocolate in every bite that will satisfy any sweet tooth.
- Perfect Texture: These muffins strike that ideal balance between fluffy and moist, thanks to the combination of sour cream and buttermilk that keeps them tender.
- Bakery-Style Presentation: The generous muffin tops and sprinkle of coarse sugar give them that professional touch, making you feel like a master baker.
- Customizable: Feel free to add your favorite mix-ins like nuts or dried fruit, or even switch up the chocolate chips for white or dark chocolate for a fun twist!
- Great for Sharing: With a yield of 12 muffins, these are perfect for sharing with family, friends, or colleagues, spreading joy and deliciousness all around!
Tips for Success
Getting those Bakery Style Chocolate Chip Muffins just right can be a breeze with a few handy tips. Trust me, these little pieces of advice will help ensure your muffins turn out perfectly every time!
- Check Your Oven Temperature: Oven temperatures can vary, so it’s a good idea to use an oven thermometer to make sure your oven is at the right temperature. This is especially important for those initial high temperatures for rising!
- Use Fresh Ingredients: Always opt for fresh ingredients, especially your baking powder and baking soda. Old leavening agents can lead to flat muffins, and nobody wants that! Also, make sure your butter, eggs, and dairy are at room temperature for better mixing.
- Don’t Overmix: Remember, when it comes to muffin batter, less is more! Overmixing can lead to tough muffins, so mix until just combined and leave some flour streaks. This will give you that coveted fluffy texture.
- Fill Muffin Cups Generously: Don’t be afraid to fill those muffin cups all the way to the top! This helps achieve those glorious bakery-style muffin tops that we all love.
- Let Them Cool: Allow the muffins to cool in the pan for about 5 minutes before transferring them to a wire rack. This helps them set properly and makes them easier to remove without falling apart.
- Experiment with Mix-Ins: Feel free to get creative! Add chopped nuts, dried fruits, or even different types of chocolate chips to change things up. Just remember to keep the total amount of mix-ins balanced with the batter so they don’t weigh down the muffins.
- Store Properly: If you have leftovers (which is rare!), store them in an airtight container at room temperature to keep them fresh for up to three days. You can also freeze them for longer storage—just make sure to wrap them well!
With these tips in your back pocket, you’re all set to create those incredibly delicious muffins that will impress everyone. Happy baking!
Nutritional Information
When it comes to enjoying Bakery Style Chocolate Chip Muffins, it’s nice to know what you’re indulging in. Here’s a breakdown of the estimated nutritional values per muffin:
- Calories: 367
- Fat: 18g
- Saturated Fat: 11g
- Trans Fat: 0g
- Cholesterol: 50mg
- Sodium: 150mg
- Carbohydrates: 48g
- Fiber: 1g
- Sugar: 23g
- Protein: 5g
Keep in mind that these values may vary based on specific brands of ingredients you use. So, if you’re watching your intake, feel free to adjust as needed. But let’s be honest—sometimes you just gotta enjoy a delicious muffin!
FAQ Section
Can I use regular chocolate chips instead of mini chocolate chips?
Absolutely! You can use regular chocolate chips if that’s what you have on hand. Just keep in mind that the muffins may not have the same delightful pockets of chocolate since the regular chips are larger, but they’ll still taste amazing!
How do I store leftover muffins?
To keep your Bakery Style Chocolate Chip Muffins fresh, store them in an airtight container at room temperature for up to three days. If you want to keep them longer, you can freeze them! Just wrap each muffin tightly in plastic wrap and place them in a freezer bag. They’ll be good for up to three months.
Can I freeze these muffins?
Yes, you can definitely freeze these muffins! Just make sure they’re completely cooled before wrapping them individually in plastic wrap. You can pop them in a freezer bag afterward. When you’re ready to enjoy one, just let it thaw at room temperature or warm it up in the microwave for a few seconds.
What can I use in place of buttermilk?
If you don’t have buttermilk, you can easily make your own! Just add 2 teaspoons of white vinegar to a measuring cup and fill it with milk until you reach the 3/4-cup mark. Let it sit for about 5 minutes before using it in your muffin batter.
Can I add nuts or other mix-ins?
Absolutely! Feel free to get creative by adding chopped nuts, dried fruits, or even different kinds of chocolate chips to your batter. Just remember to keep the total amount of mix-ins balanced so they don’t weigh down the muffins.
Storage & Reheating Instructions
To keep your Bakery Style Chocolate Chip Muffins fresh and delicious, proper storage is key! Once they’ve cooled completely, transfer them to an airtight container. This will help maintain their moisture and keep them soft. You can store them at room temperature for up to three days. If you’re like me, and can’t resist the temptation, they might not even last that long!
If you want to keep them for longer, freezing is a great option. Just make sure they’re completely cool before wrapping each muffin tightly in plastic wrap. Then, pop them into a freezer bag or airtight container. They can last for up to three months in the freezer. When you’re ready to indulge, simply take one out and let it thaw at room temperature, or for a warm treat, microwave it for about 15-20 seconds. You’ll be amazed at how they taste just as good as when they were freshly baked! Enjoy every bite!
Pour plus de recettes, suivez-moi sur ma page Pinterest.
Print
Bakery Style Chocolate Chip Muffins: 7 Tips for Perfection
- Total Time: 35 minutes
- Yield: 12 muffins 1x
- Diet: Vegetarian
Description
Bakery Style Chocolate Chip Muffins
Ingredients
- 2 1/2 cups all-purpose flour
- 2 teaspoons baking powder
- 1 teaspoon baking soda
- 1/4 teaspoon salt
- 1/2 cup unsalted butter, room temperature
- 1 cup granulated sugar
- 1 tablespoon alcohol-free vanilla flavor or vanilla powder
- 2 large eggs
- 1/4 cup sour cream, room temperature
- 3/4 cup buttermilk, room temperature
- 1 1/2 cups mini chocolate chips
- Coarse or decorating sugar, for sprinkling
Instructions
- Preheat the oven to 425°F (220°C). Butter or line a 12-cup muffin tin.
- In a medium bowl, whisk together the flour, baking powder, baking soda, and salt.
- In a large bowl, beat the butter and sugar until light and fluffy, about 2 minutes.
- Add the eggs and vanilla flavor, mixing until well combined.
- Stop the mixer, scrape down the sides, and gently fold in the sour cream and buttermilk.
- Carefully fold in the dry ingredients until almost combined.
- Stir in the chocolate chips.
- Fill the muffin cups to the top (about a generous 1/3 cup each). Sprinkle with coarse sugar and extra chocolate chips if desired.
- Bake at 425°F for 5 minutes, then reduce the oven temperature to 375°F (190°C) and continue baking for 13–15 minutes, until set and lightly golden.
- Let the muffins cool in the pan for 5 minutes, then transfer to a wire rack to cool completely.
Notes
- If you don’t have buttermilk, add 2 teaspoons of white vinegar to a measuring cup and fill to the 3/4-cup mark with milk. Let it sit for 5 minutes before using.
- These muffins taste best the day they are made. Store in an airtight container at room temperature for up to 3 days.
- Prep Time: 15 minutes
- Cook Time: 20 minutes
- Category: Baking
- Method: Baking
- Cuisine: American
Nutrition
- Serving Size: 1 muffin
- Calories: 367
- Sugar: 23g
- Sodium: 150mg
- Fat: 18g
- Saturated Fat: 11g
- Unsaturated Fat: 7g
- Trans Fat: 0g
- Carbohydrates: 48g
- Fiber: 1g
- Protein: 5g
- Cholesterol: 50mg
Keywords: Bakery Style Chocolate Chip Muffins